Triage Agent
Autogit’s Triage Agent automatically analyzes new GitHub issues and organizes them using:
- Area labels — Applied as GitHub labels
- Priority & Status — Set via GitHub Projects V2 fields
- Issue Type — Set via native GitHub Issue Types
How It Works
Section titled “How It Works”Automatic Triage (Webhooks)
Section titled “Automatic Triage (Webhooks)”- A new issue is created in your repository
- Autogit receives a webhook notification
- The Triage Agent analyzes the issue title and description
- Area labels are applied to the issue
- If configured, the issue is added to a GitHub Project with Priority/Status fields set
- Issue Type is set (if enabled on the repository)
- The
autogit:triagedlabel is added to prevent re-processing
Manual Triage (Dashboard)
Section titled “Manual Triage (Dashboard)”You can also manually triage existing issues using the Triage Dashboard:
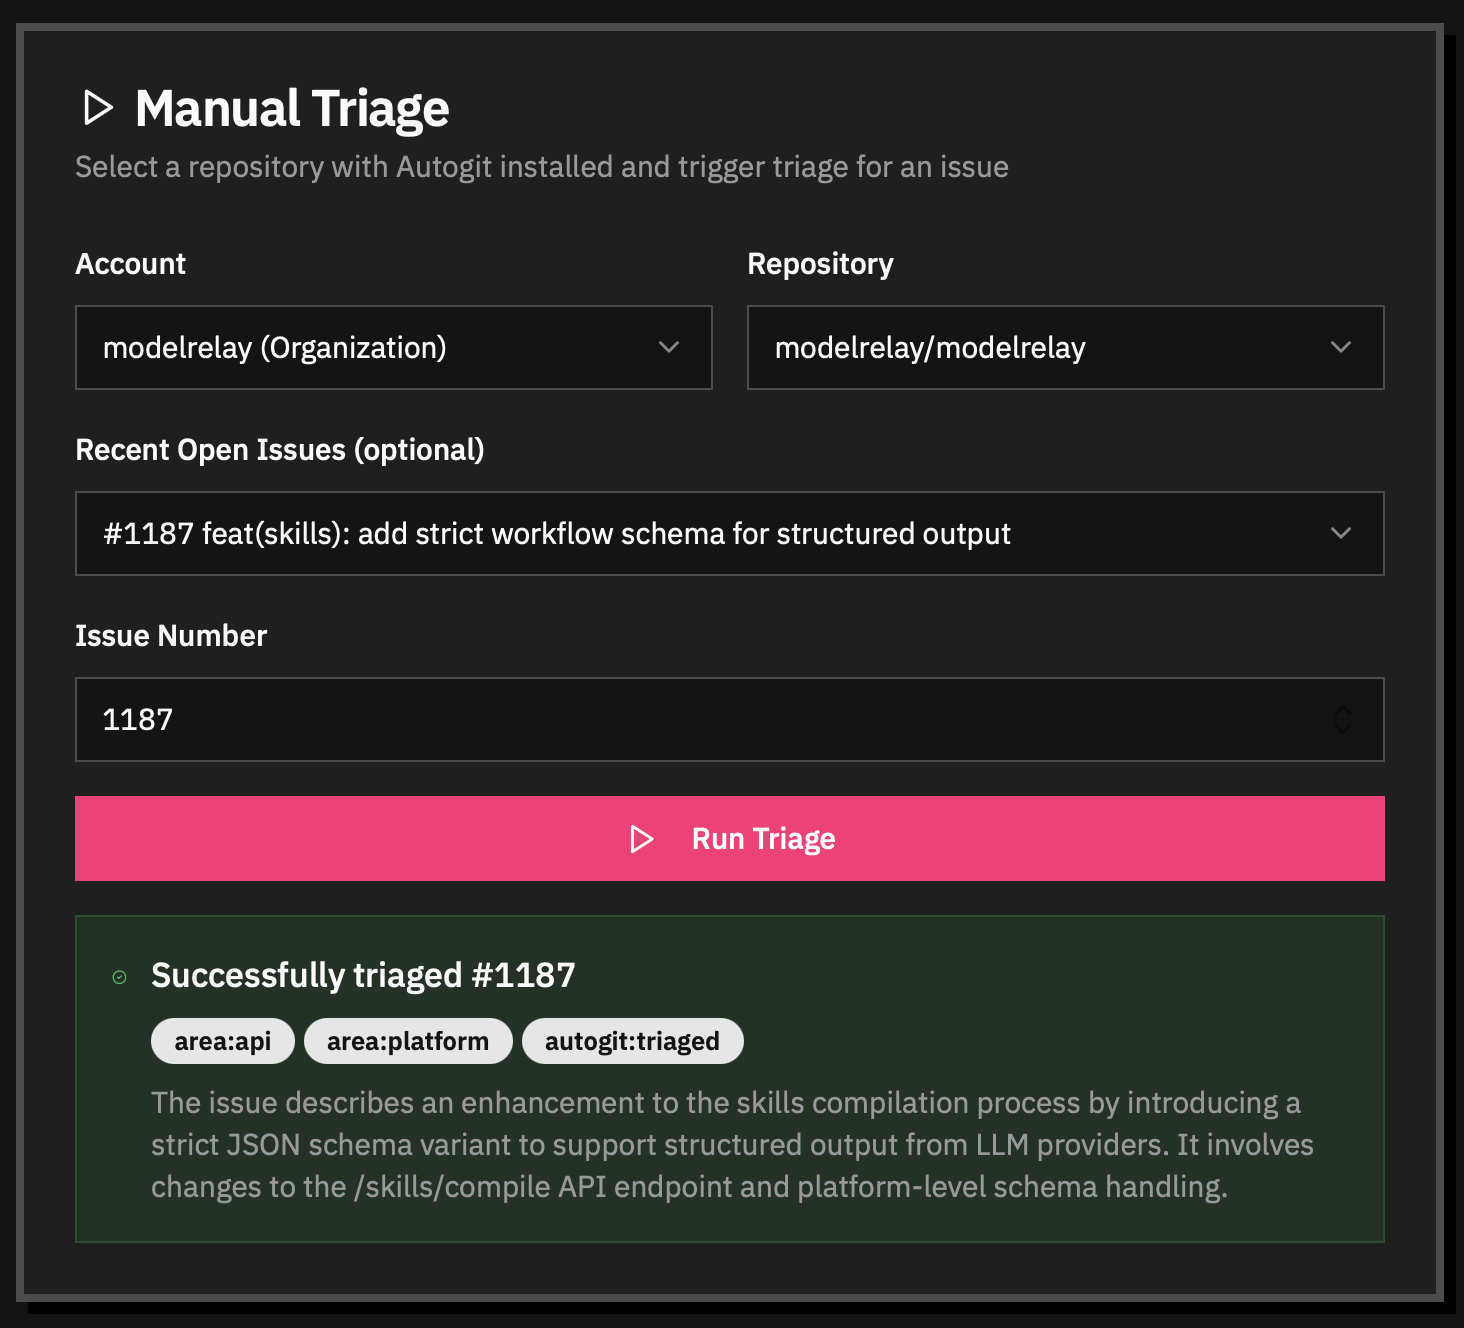
- Sign in to autogit.ai
- Go to the Triage page from your profile menu
- Select the Account (user or organization) with Autogit installed
- Select the Repository you want to triage issues from
- Choose an issue from Recent Open Issues or enter an Issue Number directly
- Click Run Triage
The dashboard shows the triage result including applied labels and reasoning.
1. Install the GitHub App
Section titled “1. Install the GitHub App”Install the Autogit GitHub App on your repository. The app needs:
- Issues: Read and write (to add labels and set Issue Type)
- Contents: Read (to access your triage config)
- Projects: Read and write (to add issues and set fields)
2. Create Area Labels
Section titled “2. Create Area Labels”Create labels in your repository for the areas you want to categorize issues into:
area:frontendarea:backendarea:apiarea:docs3. Set Up GitHub Project (Optional)
Section titled “3. Set Up GitHub Project (Optional)”To use Priority and Status fields, create a GitHub Project V2 with:
- A Priority single-select field with options like:
P0,P1,P2,P3,P4 - A Status single-select field with options like:
Backlog,Todo,In Progress,Done
The Triage Agent will automatically add issues to the project and set these fields.
4. Add Configuration File
Section titled “4. Add Configuration File”Create .autogit/triage.toml in your repository:
[triage]enabled = true
# GitHub Project name (must match exactly)project = "My Project"
[triage.labels]# Area labels that issues can be tagged witharea = [  "area:frontend",  "area:backend",  "area:api",  "area:docs"]
5. Create the Triaged Label
Section titled “5. Create the Triaged Label”Create a label named autogit:triaged in your repository. This label is added after triage to prevent re-processing if webhooks are retried.
Configuration Reference
Section titled “Configuration Reference”Full Configuration Example
Section titled “Full Configuration Example”[triage]# Enable or disable the Triage Agent (default: true)enabled = true
# GitHub Project name to add issues to (optional)# Must match the project title exactlyproject = "Autogit MVP"
# Model to use for triage (optional)# If not set, uses the default model for your subscription tier# model = "claude-sonnet-4-20250514"
# Label to apply when issue needs human intervention to ship (optional)# Issues without this label can potentially be completed by AI agents autonomouslyneeds_human_label = "needs-human"
[triage.labels]# Area labels (required) - at least one must be specified# Only these labels can be applied, and only if they exist in the repoarea = [ "area:frontend", "area:backend", "area:api", "area:docs"]
# Priority options for the LLM to choose from (optional)# These should match your GitHub Project's Priority field options# Default: ["P0", "P1", "P2", "P3", "P4"]priority = ["P0", "P1", "P2", "P3", "P4"]
# Type options for Issue Types (optional)# These should match your repository's Issue Types# Default: ["Bug", "Feature", "Task"]type = ["Bug", "Feature", "Task"]Configuration Options
Section titled “Configuration Options”| Option | Required | Default | Description |
|---|---|---|---|
enabled | No | true | Enable or disable the Triage Agent |
project | No | — | GitHub Project name to add issues to |
model | No | Tier default | Specific model to use for triage |
needs_human_label | No | — | Label to apply when issue needs human intervention to ship |
labels.area | Yes | — | Area labels that can be applied |
labels.priority | No | P0-P4 | Priority options for the LLM |
labels.type | No | Bug/Feature/Task | Type options for Issue Types |
What Gets Set
Section titled “What Gets Set”Area Labels (GitHub Labels)
Section titled “Area Labels (GitHub Labels)”Area labels are applied directly to the issue as GitHub labels. The Triage Agent:
- Analyzes the issue content
- Selects relevant area labels from your config
- Validates they exist in your repository
- Applies them to the issue
Priority & Status (GitHub Projects V2)
Section titled “Priority & Status (GitHub Projects V2)”If you configure a project name, the Triage Agent will:
- Add the issue to the specified GitHub Project
- Set the Priority field based on urgency analysis
- Set the Status field (typically to “Backlog” or “Todo”)
The Priority and Status fields must be single-select fields in your project.
Issue Type (Native GitHub Feature)
Section titled “Issue Type (Native GitHub Feature)”If your repository has Issue Types enabled, the Triage Agent will set the appropriate type (Bug, Feature, Task, etc.) using GitHub’s native Issue Types feature.
Needs Human Label
Section titled “Needs Human Label”When configured with needs_human_label, the Triage Agent will flag issues that require human intervention to ship. This distinguishes issues that can be completed autonomously by AI agents from those needing human input.
The label is applied when an issue:
- Has unanswered questions or asks for input
- Is ambiguous or unclear about what’s being requested
- Lacks sufficient detail (e.g., bug reports missing reproduction steps)
- Requires clarification or decision-making from a human
- Contains multiple unrelated requests that should be split
Issues WITHOUT this label are candidates for autonomous AI completion — they have clear requirements and sufficient detail for an AI agent to implement without human intervention.
The label is automatically created if it doesn’t exist in your repository, with a red/orange color to make flagged issues stand out.
Example Configurations
Section titled “Example Configurations”Simple Project (Labels Only)
Section titled “Simple Project (Labels Only)”[triage]enabled = true
[triage.labels]area = ["frontend", "backend", "docs"]With GitHub Project Integration
Section titled “With GitHub Project Integration”[triage]enabled = trueproject = "Product Roadmap"
[triage.labels]area = [ "area:web", "area:api", "area:mobile", "area:infra"]priority = ["Critical", "High", "Medium", "Low"]type = ["Bug", "Feature", "Enhancement", "Chore"]Monorepo with Team Areas
Section titled “Monorepo with Team Areas”[triage]enabled = trueproject = "Engineering Board"
[triage.labels]area = [ "team:platform", "team:product", "team:devex", "team:infrastructure"]With Needs-Human Flagging
Section titled “With Needs-Human Flagging”[triage]enabled = trueproject = "Product Roadmap"needs_human_label = "needs-human"
[triage.labels]area = ["frontend", "backend", "api", "docs"]Issues that require human intervention will be flagged with needs-human. Issues without this label are candidates for autonomous AI completion.
Troubleshooting
Section titled “Troubleshooting”Issue wasn’t triaged
Section titled “Issue wasn’t triaged”- Check the config file exists: Ensure
.autogit/triage.tomlis in your repository’s default branch - Verify the config syntax: Invalid TOML will cause triage to fail
- Check for existing
autogit:triagedlabel: If present, the issue was already processed - Check GitHub App permissions: Ensure the app has Issues and Projects permissions
Project fields not set
Section titled “Project fields not set”- Verify project name: The
projectname must match exactly (case-sensitive) - Check field names: Priority and Status fields must exist in the project
- Check field options: The LLM’s selected option must exist in the field
- Verify project permissions: The GitHub App needs Projects read/write access
Error comment on issue
Section titled “Error comment on issue”If triage fails, a comment is added to the issue explaining the error:
- “Could not find a GitHub Project named…”: Project name doesn’t match or app can’t access it
- “Failed to add this issue to the project”: Permission issue with the project
- “The account that installed Autogit is not registered”: The GitHub user or organization that installed the app needs an Autogit account
Triage keeps reprocessing
Section titled “Triage keeps reprocessing”Ensure the autogit:triaged label exists in your repository. Create it manually if needed.
Idempotency
Section titled “Idempotency”The autogit:triaged label ensures issues are only triaged once:
- When triage completes,
autogit:triagedis added as the final label - If an issue already has
autogit:triaged, it won’t be processed again - This is safe for webhook retries — GitHub may send duplicate webhooks